With apologies to Chummy McGregor, of the Glenn Miller Orchestra (my Dad’s favorite) who, in 1942, wrote the unforgettable It Must Be Jelly ‘Cause Jam Don’t Shake Like That.
After last week’s adventure to the EAT! Vancouver food show, after marveling at the chocolate bolts made by Chef Christophe Bonzon for his impressive chocolate sculptures, and having him explain to me that he often uses gelatin to create molds for “just about anything you can mold”, I was fascinated and determined to have a go at it.
Christophe did say that he never uses gelatin molds for anything that is going to be consumed, only for sculpted chocolate. It is not that the chocolate is rendered inedible afterward, it just doesn’t have the texture of perfectly tempered chocolate, as the moisture in the gelatin affects the surface of the chocolate. A bit of air brushing takes care of that for the professionals, but not having an air brush, I will cross that bridge when I come to it.
Since I am always on the lookout for things vegetarian, I am going to attempt molding with agar-agar, as well as gelatin, to see what the differences may be, and if either medium is superior.
Ah yes, back to the “kitchen-as-lab”. Now, where did I leave my white coat?
The idea of creating molds was first posed to me by a talented friend who is a silver jewelry artist. She has been working on some original and expressive miniature heads and icons, and thought it would be fun to try casting some of them in chocolate.
Short of hiring a company to make a silicon mold for approximately $350.00, I didn’t have an answer for her, but promised to see if I could find out. So, talking to Chef Christophe last week had a wonderful synchronicity.
Without the careful and thoroughly researched lessons and curriculum of the Ecole Chocolat, I was definitely flying blind this week, but I did manage to find one short video on the Internet, with some footage of a chef casting a chocolate coin.
I also found a link to Jacques Torres’ technique for casting a chocolate champagne bottle, using gelatin.
While I did not feel equal to that mammoth undertaking, I cast my eye around the kitchen, and landing upon the fruit basket, had an inspiration to start out on an avocado.
Hmm, this is where the science, or perhaps engineering, comes in. I poured a first layer of prepared, liquid gelatin (I used one envelope powdered, and prepared it as per the instructions on the box) into a 4 cup measuring cup, and chilled it in the fridge, until set.
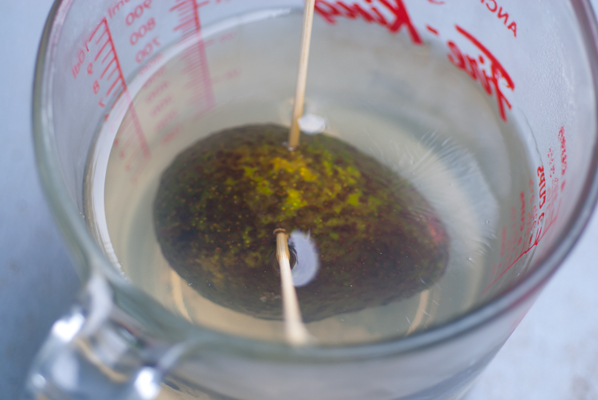
Then, with my “firm bottom” in place, I placed an avocado on the gelatin layer, and poured in gelatin to fully cover the avocado (three more envelopes worth).
Except that the avocado floated. Hmm, I have to keep the avocado submerged in the gelatin, with enough around it, so that I will be able to remove it later, and have a firm enough mold.
I eventually settle on putting two wooden skewer “antennae” into the avocado, submerging it into the gelatin to the bottom layer, and keeping it submerged with two extra larger binder clips (which I had purchased for use in two sided Easter bunny molding), clipped to the sides of the measuring cup … very carefully.
Note: I actually found that placing my round bottomed, 6 cup teapot on top of the measuring cup also worked to hold the skewers in place, but was worried that one good bump would knock the whole set-up sideways, and ruin everything.
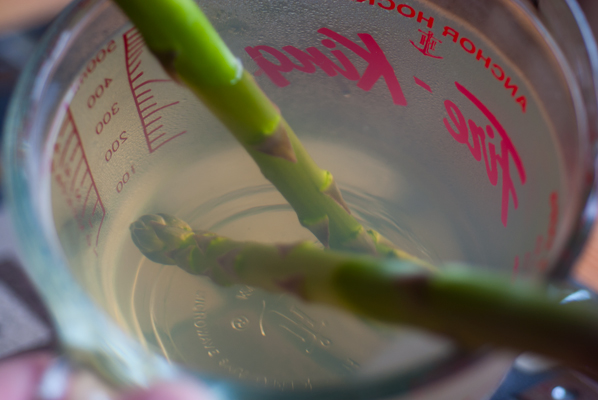
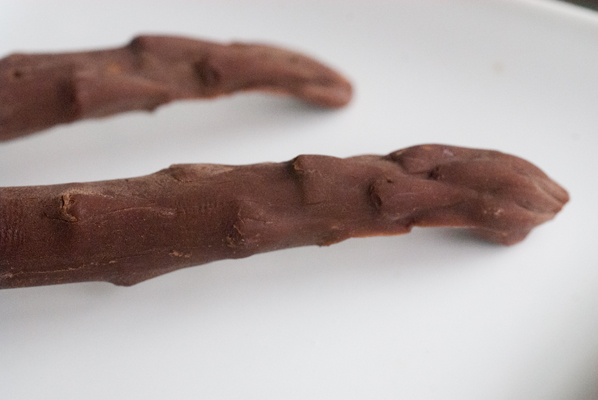
I placed the whole curiosity in the fridge, and prepared another 2 cups worth of gelatin, this time, inserting two fresh asparagus spears from our garden, into the setting gelatin. Because the back ends of the spears stuck out of the top and added stability, I was able to leave them balancing on their own. They also, went into the fridge.
I turned my attention to the agar.
Easy to find at Asian grocery stores, I always think of agar as the medium used to culture substances in Petri dishes. I know it is very popular as a vegetarian substitute for gelatin, and have actually wanted to try making marshmallows with it.
But that is for another day. Today, it will also be playing host to an avocado, in the hopes of creating a suitably stiff mold for chocolate.
The agar is super easy to deal with, requiring water brought to the boil, adding the agar, stirring, and simmering for 7 minutes. I poured this mixture into an empty cylindrical biscuit container, and applied the same “suspend the avocado” technique.
Agar will, apparently, set up at room temperature, but refrigerating makes the process go faster.
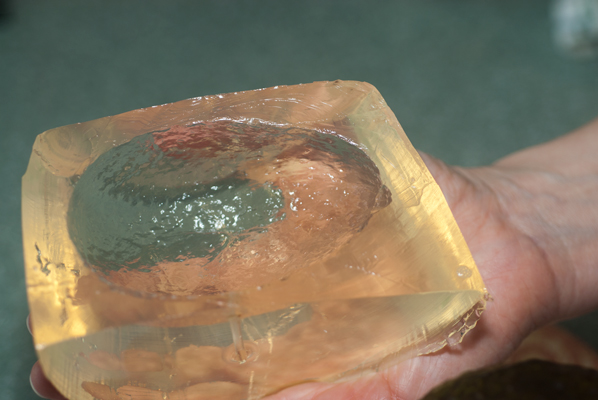
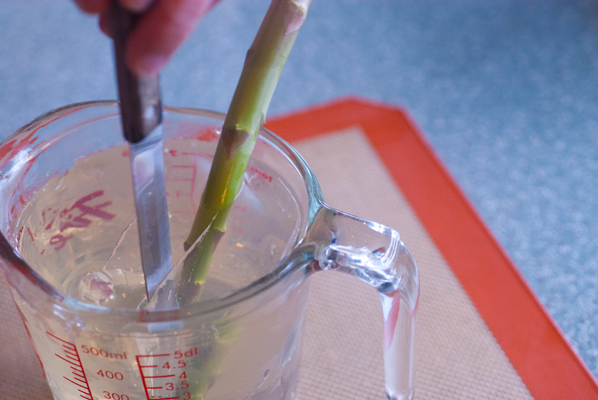
A thin, hot, wet, knife inserted between the wall and the gelatin/agar releases some of the vacuum, and I am able to finesse my hand down the side to release to bottom. The whole thing slides out and I have these weird and wonderful, gravity-defying, suspended vegetables.
It is a simple matter to bisect the gelatin/agar, and release the avocados, leaving me with two halves, much like an Easter egg. I place each half in a steep sided bowl, to help retain its shape.
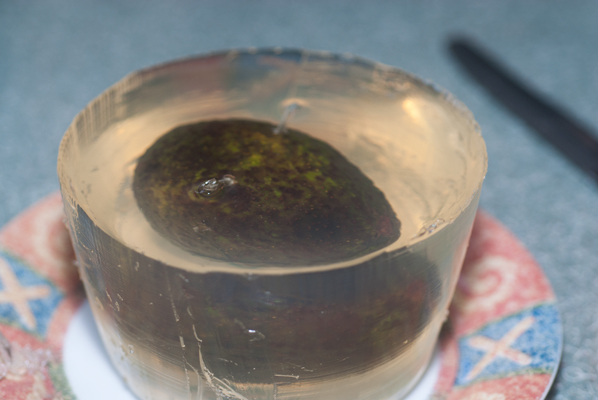
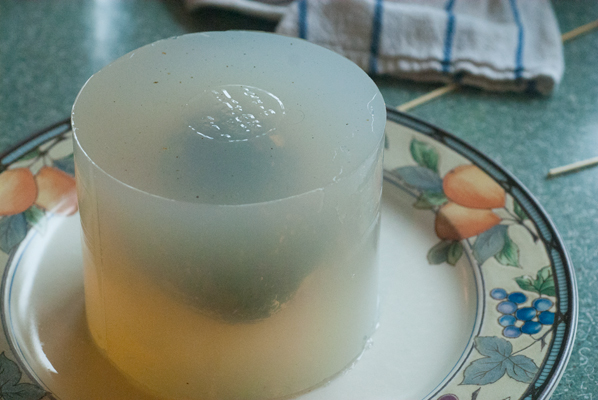
In order to get the asparagus out, rather than sliding the whole thing out of the measuring cup, I make a slit at the top of the gelatin, down the asparagus spear, and gently applying pressure with fingers to the top of the gelatin, slide the spears out, leaving an asparagus shaped cavity. I think I have been able to keep the definition, but I will see, once the chocolate is poured in!
I temper some milk chocolate, and fill each of the avocado shaped molds, trying both a silicon pastry brush to begin with (thinking that will help to get the chocolate into all the crevices), but find it much easier to use a thin silicon spatula, and more chocolate, quickly working it over the whole surface of the indentation.
I use a funnel to pour the chocolate into the asparagus molds.
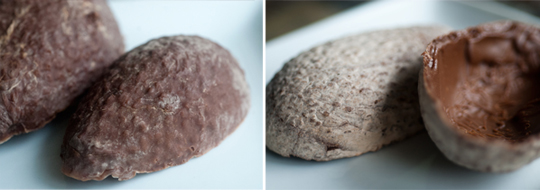
As you can see from the resulting molded shapes, they range from looking “absolutely scary and disastrous” to “not bad”.
The avocado molded in the agar, definitely came out better, and I would say, it is by far the best of the two mediums to work with, which really surprised me. It just seemed to set up so much more firmly, and while as damp/moist on the surface as the gelatin, it was easier to dab that moisture off.
The chocolate set very quickly in the agar, and released so easily, it just slipped out. I thought the definition was very good, and while there was a small amount of bloom it was nothing like the “it came from outer space” avocado I ended up with, using the gelatin.
The asparagus spears were fun to do, and although I lost some definition on the bottoms, I would be willing to try them again, and perhaps use a thin paintbrush to get the chocolate right to the bottom of the mold – that’s a tricky one!
Perhaps I’ll try carrots, next.
In conclusion, I would say that obviously, my technique still needs a lot of work, but now that I have a sort of template for how to do it, I would certainly be willing to have my friend come over so we could try casting a head or two!

