This week has many layers.
I’ve been looking at some gorgeous chocolates, on the websites of Ecole Chocolat graduates, and they have inspired me to try.
All I have to do is create two compatible layers, which will look sharp, taste good together, and be resilient enough to hold their shape, and not melt into each other.
There is nothing like the challenge of a new tool.
This one looks like a white plastic window frame, and indeed it will frame a layer of caramel, on top of which I will put another ever so slightly deeper frame, which in turn will hold a layer of dark chocolate ganache.
Hopefully, these frames will enable me to create beautifully layered chocolates, which I will then hand dip.
So I need to be able to put them together, cut them, and dip them, without them melting or falling apart at any stage.
Did I say “All I have to do ….”?
I turn, once again, for assistance and guidance to the wonderful video, provided on the Ecole Chocolat website, featuring Chef Frederic Bau, of Valrhona Chocolates. I quickly brush up on the making of un grand ganache, fait avec beucoup de friction.
Oui, I have it.
Perfectly warmed ream added in minute quantities to the not quite melted chocolate, a great deal of stirring to incorporate the cream into the chocolate, and patience.
I quite love the process of making ganache. It is contemplative, all that stirring round and round, and the mixture goes through many phases of looking like a dismal failure, until it suddenly all holds together in a sleek, glistening mass.
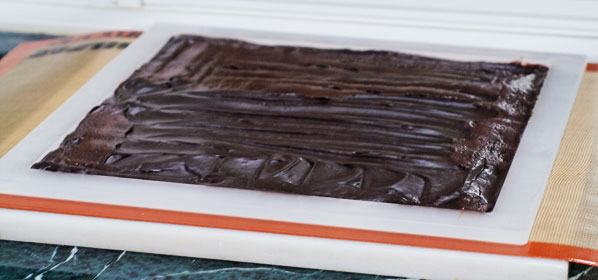
I pour this into the first frame, over a Silpat mat, on a marble slab, and hope against hope that my emulsion will hold, and the ganache will crystallize without streaks. I try to make sure the top is perfectly level in the frame, using the bench scraper across the top. Not too bad. I leave it to rest, overnight. When I peek in the morning – it is still holding. Thank you, chef!
I didn’t manage to make caramel successfully, last time (it turned out rather crumbly and more like toffee), so it is with some trepidation that I venture into this.
I need it to be firm enough to cut (not runny like a Caramilk bar), but not jaw-breaking so that it squishes the ganache layer. I find a cream caramel recipe at the Science of Cooking website:
I love this website. It appeals to my Science Nerd side, and explains the chemistry going on while you are cooking.
I am sure it has saved me from more than one disaster, as I tend to be an “oh, a little bit of this instead of that will probably be just fine” type of cook, which can turn out some very original dishes, but in candy making (and especially when working with lovely, expensive chocolate), timing and exact measurements are of the essence, so I read the instructions carefully.
I am fascinated to learn that the lovely, brown colour in caramels comes from:
“a reaction between the sugar and the protein in the cream. This reaction is called the Maillard reaction, after the French scientist who discovered it. The rich brown color of toasted nuts and barbecued meats also comes from the Maillard reaction.”
Okay, now I have to work “the Maillard Reaction” into a sentence, which will be quite a laugh, on this wintry wet day, as it is the same reaction that happens when you put on self tanning lotion or when you barbecue meat.
I hover over the temperature of my caramel, determined to “slab” it just as it reaches the Firm Ball stage.
Unfortunately, I have used a pot slightly too small for the bubbling, boiling mass of sugar and cream, and have to divide it into two pots.
Twice as much hovering, two candy thermometers, much sweating.
Wash down those crystals on the sides of the pan!
Check the temperature.
Don’t stir it!
Watch the boiling so that it doesn’t rise up over the sides of the pan.
At last. 248 degrees F. The Firm Ball stage.
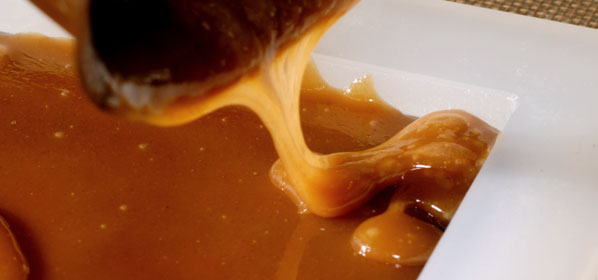
Fortunately, one pot “peaks” slightly before the other, and I sit the next frame on top of the one for the ganache layer, and pour the caramel into it.
The caramel sets up very quickly, as it is such a thin sheet, and there is very little time to get the mass into the corners of the frame, and smooth the top. Well, not bad, but a few ridges in the layer, like waves of sand on a beach.
I have my fingers crossed that the hot caramel will not melt the ganache. It seems to be holding. The caramel itself looks pretty fine. The Maillard Reaction has obviously worked, this time.
The whole thing goes back to the cool room, to set up. The slabbed mass feels like half a ton, as I carry it carefully back to its place of honour, in my rather cold bedroom. There has to be an easier way to do this, but I can’t leave this to set on the kitchen counter and risk a curious cat dropping a whisker into my lovely layers.
Hmm.
There’s an original chocolate idea – I could even call it the Cat’s Whisker. Stirs up images of the old Monty Python “Crunchy Frog” sketch
The next morning, I am up early.
I now have a sort of routine for “preparing the zone”, when I know I will be tempering chocolate in the kitchen. I scrub all my surfaces with a tiny bit of soap followed by a hot water rinse, strategically lay out a series of thin flexible plastic cutting mats on the counter tops, surrounding me on three sides, I lay out old clean towels to catch any moisture from the bottom of the bowl of melted chocolate … and finally, get out the slab of chocolate, from the “chocolate shelves”, along with the glass bowl which has the right “feel” for tempering, and the all important scrapers, for tabliering.
It turns out, I have to flip over the whole mass of layered centres, in order to cut them, because of course, I have the ganache layer on the bottom, and it will be squished by the efforts of cutting through the caramel, unless I flip it.
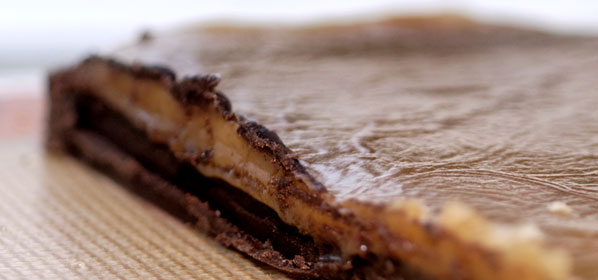
Which I do, with the aid of all those flexible plastic mats. Okay, the layers have held quite well, but I have to work quickly, as the caramel is softer and more fluid the closer I cut to the centre of the mass, and in small pieces, has a tendency to slide off the ganache. Once I have the whole slab cut up, on plastic cutting boards, I poke them all back into line, slide cookie sheets under them, and put them in the freezer for half an hour, while I temper the chocolate.
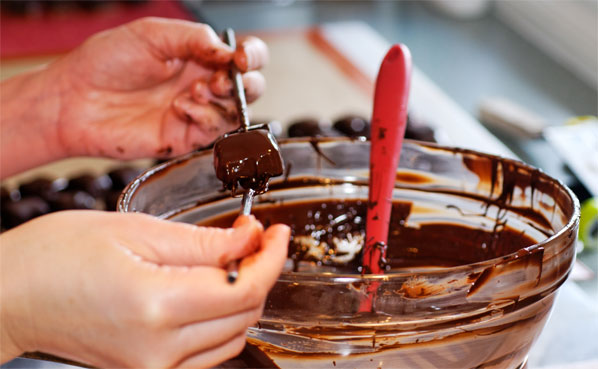
Once everything is ready, the centres are pulled from the freezer, and I know I have to be quick. I am like a machine with the dipping forks, and am actually quite surprised when the chocolate doesn’t seize, as I am sure there must be stray drops of moisture.
But I am lucky, the chocolate remains fluid, and they hold their shapes, as one after another, the huge batch of centres is dipped and laid out on the Silpat. Next time, a half recipe! I sit down, stretch out my cramped muscles, and await the family’s verdict, as the boys are due home for lunch.
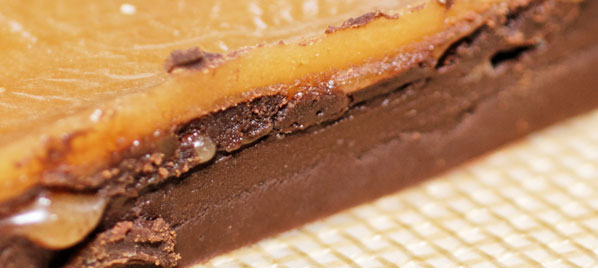
The verdict: they are delicious, but very chewy. They can either be enjoyed by popping the whole thing in the mouth at one go, or by scraping off the ganache layer with the teeth, then letting the caramel melt on the tongue, reminiscent of the way we used to eat Mars bars.
I think next time I make these, I would definitely do the caramel layer first, prepare half the recipe and use one of the thinner frames, to provide a slender layer of caramel.
The ganache was lovely, and just the right amount, so I would prepare it in exactly the same way. And practice makes perfect in dipping, so I just need to keep doing it. I would like to able to achieve a thinner coating of chocolate on the finished product, but the boys disagree!
All in all, the many layers of this week’s homework were very satisfying to do, as they all came together like layers of paint on a canvas.
… and then what fun to squish them all up in your mouth!
