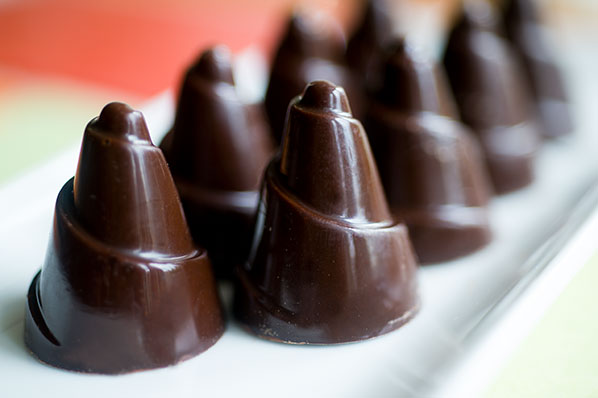
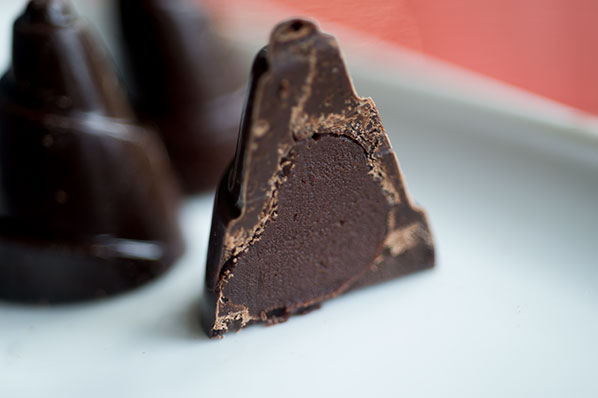
I love chocolate peppermints. They remind me of winter, cold noses, hands wrapped around steaming mugs of hot chocolate, Vick’s vapo-rub …
And maybe because they are “very refreshing” to quote a certain episode of Seinfeld, I never feel like an absolute glutton after eating them … just someone with really fresh breath.
On occasional winter afternoons when I was a kid, I used to buy a quarter pound of after dinner mints for about 50 cents, at the candy shop in the mall . They were the cheapest thing on offer. I would then sneak them into the Saturday movie matinee.
Filled with teenaged indignation at the ridiculous rule about no outside candy being allowed in to the cinema, I would shove the bag into the chest of my down jacket (puffy winter clothes being one of the advantages of growing up in Canada), zip it up and feeling like I was outwitting “the system”, stride past the overpriced snack bar, and into the safety of the darkened theatre.
Those after dinner mints were virtually indestructible, but still melted satisfyingly in the mouth (being made almost entirely of confectioner’s sugar), and a bag lasted the whole movie. I once made one last through a double feature.
Every Christmas in our family, we looked forward to wafer thin After Eight mints in their papery sleeves, consumed with hot tea while watching Alistair Sim in A Christmas Carol. One box would “do “ the whole family.
In adulthood I still eschew the overpriced popcorn, favouring a small box of Junior Mints purchased at the grocery store en route to the show. They are often accompanied by a mug of peppermint tea – smuggled in to the movie in my stainless steel commuter mug, of course.
And if their delicious cool tastiness was not reason enough to appreciate both chocolate and peppermint, both contain ingredients which may help in lessening two of winter’s most familiar miseries: cold and stomach flu.
From Wikipedia:
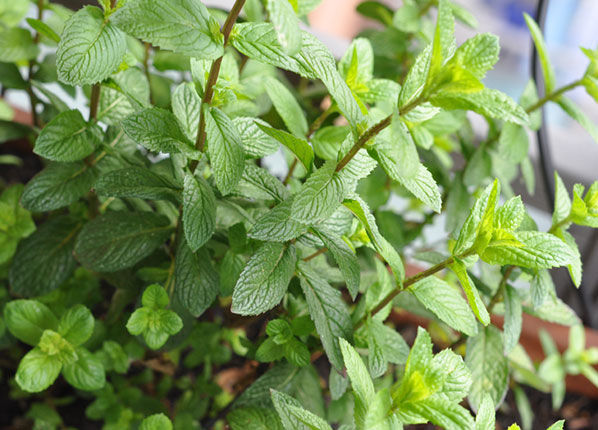
Peppermint(Mentha × piperita, also known as M. balsamea Willd.) is a hybrid mint, a cross betweenwatermint>and spearmint. The plant, indigenous to Europe, is now widespread in cultivation throughout all regions of the world. It is found wild occasionally with its parent species.
Peppermint has a long tradition of medicinal use, with archaeological evidence placing its use at least as far back as ten thousand years ago.
Peppermint has a highmenthol content … Menthol activates cold-sensitive receptors in the skin and mucosal tissues, and is the primary source of the cooling sensation that follows the topical application of peppermint oil.
Peppermint is commonly used to soothe or treat symptoms such as nausea, vomiting, abdominal pain, indigestion, irritable bowel, and bloating.
And, from the University of Maryland Medical Center
Colds and Flu
Peppermint and its main active agent, menthol, are effective decongestants. Because menthol thins mucus, it is also a good expectorant, meaning that it helps loosen phlegm and breaks up coughs. It is soothing and calming for sore throats (pharyngitis) and dry coughs as well.
And this really makes me happy: good dark chocolate may be a better cough suppressant than codeine.
Dark chocolate contains a considerable amount of theobromine (the ingestion of which, it should be noted, is fine for humans, but deadly for some animals) which appears to relax the Vagus nerve, the nerve responsible for triggering the cough reflex.
Since dark chocolate contains 450 mg of theobromine per ounce, you don’t need much – an ounce or two should be enough to suppress coughs for several hours, without the drowsiness that often accompanies cough syrups (for more see this article).
So, because the chilly weather has returned, and cold and flu season is upon us, here is, I think, a near perfect little treat for these wintery days.
The original recipe is from Gordon Ramsey’s Mint Chocolate Truffles, which produces a very soft ganache.
Here is the original recipe, and here is my variation:
For the ganache:
- 250ml whipping cream (33% bf)
- Edible/Ingestible Peppermint Oil to taste (I used about ¼ teaspoon of LorAnn’s)
- 250g good dark chocolate, chopped (70% cacao)
- 65g unsalted butter
- 65g honey
Method
- Heat chopped chocolate in a glass or stainless steel bowl over a bain marie of gently simmering water, until 50% melted.
- Heat cream in a medium saucepan, gently, until small bubbles break the surface of the cream.
- Add the hot cream to the chocolate in 5 additions, stirring well after each addition.
- Add the butter, then honey to the cream/chocolate mixture. Continue to stir until the chocolate has melted and the mixture is smooth.
- Pour the mixture into a glass cake pan (2 litre), cover and chill in the fridge for an hour or until scoopable.
Temper 500 gms of dark chocolate ( either tabliering or using the seeding method) for the mold
Once the chocolate is in temper (be very careful that it is or you will not be able to unmold the bon bons)
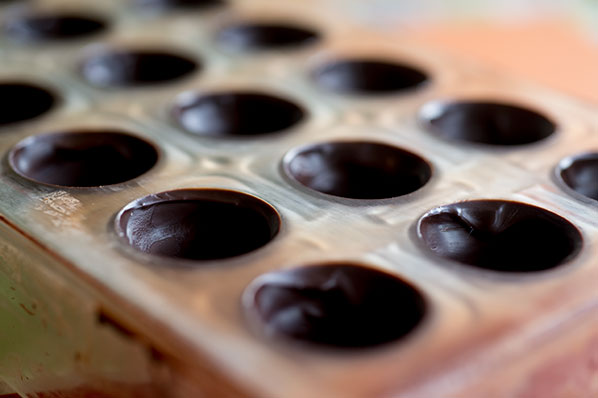
Pour the tempered chocolate into the mold (I have a very pretty “spiral point” one which is deep enough to accommodate a good amount of filling) filling each cavity all the way, letting the excess chocolate spill over the edge, back into the tempered chocolate.
Agitate the mold to ensure you have no air bubbles in your chocolate, and all the surfaces are covered.
Upend the mold over your bowl of chocolate and let the excess fall back into the bowl. Give the upended mold a small shake. Turn it back upright and give it a good rap on the edge of the counter to release any air bubbles.
Scrape a putty knife across the top surface of the mold, to rid it of excess chocolate and ensure a clean edge on each cavity. Scrape any excess chocolate from the rest of the mold. Inspect the cavities closely for air bubbles or missed coverage spots.
Put the mold in a cool room (we use our Younger Son’s bedroom – it has very little insulation, and is known as the “walk in fridge”.
Pour all of the remaining chocolate out onto a Silpat mat (or piece of parchment paper) to harden in a thin layer (which will make it easier to break up, to reheat for the bottom layer).
When the bottoms of the mold appear cloudy and grayish and you have heard small cracking sounds (indicating the chocolate pulling away from the sides of the mold), the cavities are ready to be filled with the ganache.
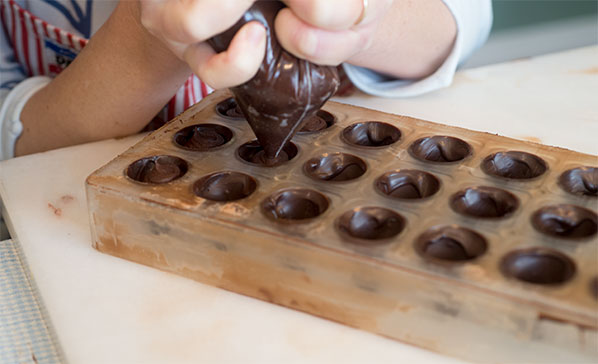
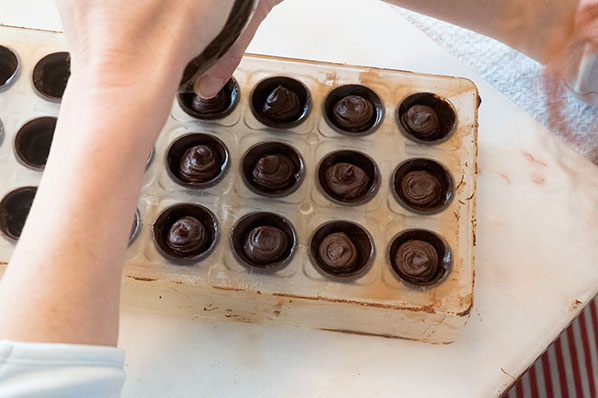
Scoop the ganache into a heavy duty freezer bag, squeeze out any air bubbles before sealing the top, and cut off a very small corner (better to start small and increase the size if you need to) of the bottom of the bag, to form a piping bag.
Pipe the ganache into the bottom of each cavity, leaving a small lip of chocolate at the top, to ensure a good seal when you put on the bottom coat of chocolate.
Leave the filled chocolate mold for a few minutes, tap it to steel the ingredients, then re-temper the leftover chocolate, and pour it onto the filled cavities.
Scrape the putty knife gently but firmly across the bottom of the mold, to encase the chocolate in the cavities and ensure a clean bottom edge.
Put the mold back in the cool room for a couple of hours.
To release the chocolates, carefully but quickly reverse the mold over a flat surface and tap it firmly on that surface. The chocolates should fall out. If they don’t, let the mold cool for a little longer. If they appear really stuck, you can try putting them in the fridge or even freezer for a very short time (a few minutes).
