 My big boy is going to be seventeen.
I cannot believe how quickly these years have gone by.
Every July, I find myself with a sappy smile on my face, as I remember the heat and heaviness of the final days of pregnancy.
In what I would later come to appreciate as part of his laid back personality, our boy was in no hurry to rush his appearance.
My partner and I walked around for days after our due date, my swollen fingers and toes feeling like a bunch of bananas, seeking shelter in the cool of Capilano Canyon. I remember squatting on my heels and rocking, this being the only comfortable position left for my big belly.
Our firstborn son entered the world in the middle of a scorching heat wave. I don’t think either one of us wore clothes for the first week of his life.
So many of his birthday parties have been spent at the swimming pool, and accompanied by the smells of sunscreen and the sticky sweetness of lemonade.
So, it’s not really surprising that he has requested an ice cream cake for his birthday, for as long as I can remember. And he usually asks for one from Dairy Queen.
But this year, he has graciously accepted my offer to make everything from scratch.
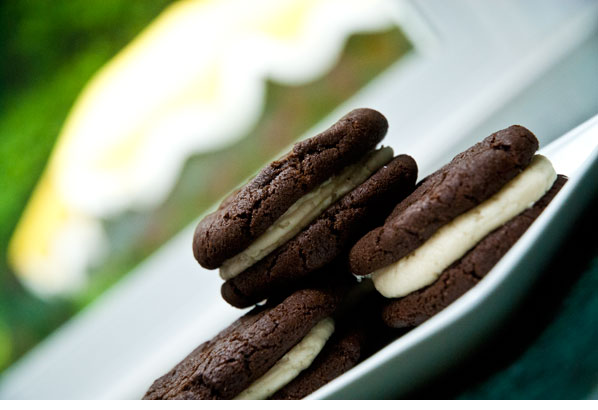
So where does one start? Well, to make homemade Oreo cookie Ice Cream Cake, Step One is to make the Oreos. A confession, because I know my kids don’t often read this: I love Oreos.
I love the slightly salty crunchy cookies, and the blindingly white overly sweet goop in the middle, especially the ones with “double stuff”. I just try not to think about the ingredients.
So, I feel really good about the potential of this recipe for homemade Oreos, when I discover it, at Smitten Kitchen.
This is a simple, fun recipe, which yields two dozen “Oreo sized” sandwich cookies (because you make 48 singles), or one dozen big fat cakey ones (if you make 24 big singles).
I made the icing using butter and Earth Balance vegetable shortening, which is expensive, but has a nice consistency, has no scary GMO ingredients or trans fats, and is vegan. This is, after all, for a very special birthday cake.
I got to use one of my favourite and lately underused kitchen tools – my piping bag. Without a tip, I squish a lovely fat sphere of icing in the middle of one cookie, and top it with another, for that smooth, rounded look. Overkill, in this case, as I am going to smash them up, but it does make the cookie look good.
Next step: make the ice cream.
While perusing my ancient and beloved stack of Chocolatier magazines, I come across an old advertisement for Eagle Brand Condensed Milk, featuring a recipe for still-frozen (made without an ice cream maker) Oreo Cookie Ice Cream. Perfect. Here is a close equivalent, found online
A couple of minor differences between this recipe and the one I used: no added water, 4 teaspoons vanilla, instead of one. Make sure to line the 9 x 5” pan with aluminum foil. Seal the top with foil, as well.
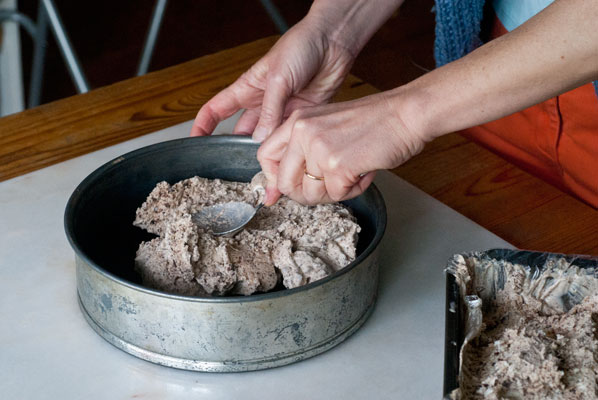
While I am waiting for the ice cream to harden – the nice thing about this recipe is that it doesn’t seem to freeze rock hard – I line a 9” spring form pan with the leftover crushed Oreos, as a base, and consign this pan to the freezer.
My son loves white chocolate and white cake, so I have made a single layer of White Chocolate Whisper Cake, from the meticulous and wonderfully obsessed Rose Levy Berenbaum’s The Cake Bible.
I think I have one of the first editions of this venerable text (now in its 48th printing). So well used that the whole middle section of photographs is falling out, it is an old friend I will never part with, and my go-to for any question regarding ingredients, equivalents, substitutions and inspiration for the creation of wonderful cakes.
The layer comes out as a nice uniform round, slightly smaller than 9”, and therefore a perfect size to fit on top of the layer of ice cream, which has frozen to a good spreading consistency.
On goes the cake layer, on top of 3/4 of the ice cream, and I push down with both hands to ensure it adheres, and that I have a smooth top. I “ice” the cake surface with the remaining ice cream, making sure to fill in the slight gap around and down the side of the pan.
I overwrap the whole thing with heavy duty aluminum foil, and it goes into the freezer to “marry” the flavours.
I’ve had such fun with the piping bag, I have kept it out, and now, with the white chocolate left over from another project (have I mentioned how lucky I am to be able to have multiple chocolate projects on the go?), I pipe a dark chocolate birthday message onto the white.
This will sit atop the cake, at the last moment, when it is ready for serving.
Although it merely says “Happy Birthday Matthew” with a big sappy smiley face at the bottom (just like mine), what I would really like to say to my tall and handsome son, who made his long awaited for appearance seventeen years ago, this week, is:
“Thank You for bringing a smile, a wisecrack, a belly laugh and the warmest hugs a mother could ask for, into every day of my life. Here is to a wonderful, exciting year, with lots of love. Blow out your candles and make a wish.”


