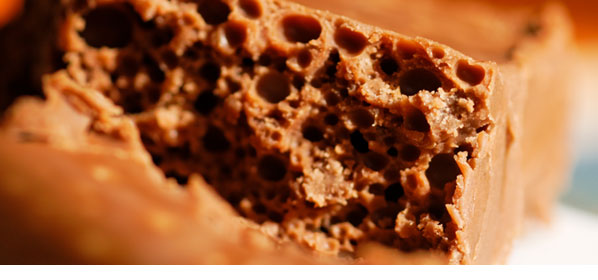
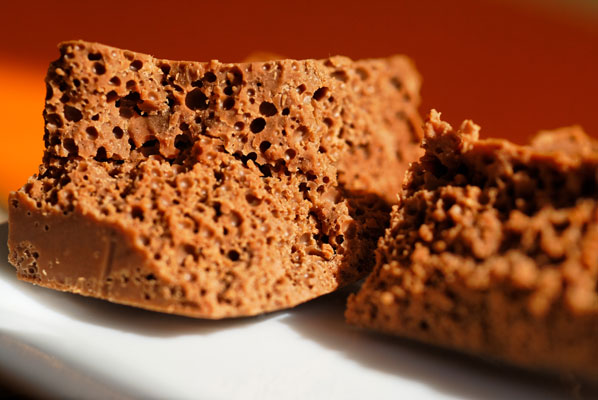
“You feel the bubbles?” “I love the bubbles”.
I adore this commercial, where the two women are letting Aero bars melt on their tongues, while speaking.
Bubbly chocolate, in form of the Aero and the Wispa bar, has been around and been enjoyed since 1935, when the process was patented and sold for manufacture by the Rowntree’s company. These bars have been perennial favourites in the UK, Canada and many other countries around the world.
Aero was always one of my favourites as a child, because it was so smooth and creamy … and bubbly.
According to Wikipedia, this is how they make ‘em in the plant:
Aero bars are manufactured in nut-free services. They are made in a number of discrete stages beginning with deposition of unaerated shell chocolate into the bar moulds.
A frozen cone shaped to fit into the bar is then pushed down to spread the liquid chocolate into the entire mould and set it. The aerated chocolate is then deposited into the centre and the moulds are shaken to distribute the chocolate evenly in the cavity. This is then chilled to set the bubbly chocolate in place before a final backing off deposit is created to give the back. The moulds are then shaken again to get a flat even back.
The moulds are specially shaped to ensure that no meniscus is formed on the bottom, which can give the chocolate a scuffed appearance and also cause issues with the machines when they break off and build up. The bars are then chilled again for a longer period. This helps to make the chocolate contract for easier demoulding.
The moulds are then tipped over and hammered to demould the bars, which then go to the packaging section.
Now, with prices for cocoa, sugar, and other commodities soaring, candy makers are finding this simple ingredient—air—can help pump up profits, as well.
And it’s not just “supermarket” chocolatiers who are doing it. Michelin star chef, Heston Bluemental has incorporated aerated chocolate into his Designer Black Forest Gateau.
Air. Is that an ingredient ?
The text instructions for the aerating procedure are here, courtesy of Ed Engoronon of Chocolatique.
So of course, being a brave student of Ecole Chocolat, I have to give this a try.
The list of equipment necessary for doing this reads like a science experiment. I will need:
- A whipping cream siphon with 3 cartridges
- A rigid plastic container with a tight-fitting lid: use a corkscrew to put a hole in the middle of the lid
- A Space Bag : the plastic clothes storage bags with a valve, and a “zipper” closure
- A home vacuum cleaner with a hose
Ingredients:
- 1 pound of good quality chocolate
- 2 ounces of ground nut oil (like walnut oil or pecan oil)
Method:
- Make sure you have everything ready to go before starting as you will have to work very quickly.
- Be sure the siphon is completely dry inside before adding the chocolate.
- Melt, temper and combine the chocolate and oil into a warmed siphon.
- Quickly discharge 3 air cartridge charges into the siphon.
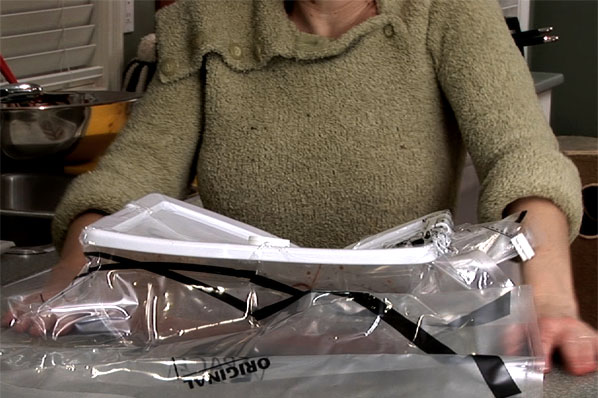
- Release the contents of the siphon into the plastic box and place the box inside the Space Bag with the hole in the cover aligned under the vacuum valve.
- Vacuum out all the air.
- Chill the box in the bag for 50 minutes or until the chocolate is firm.
I watch Chef Heston Bluemental’s technique over and over again, carefully setting up my station, and doing a dry run of every step of the procedure. I am glad I thought to turn on the vacuum, to make sure nothing nasty was stuck in the hose (like a clump of cat hair). A very good thing I did that, as I had neglected to plug it in. Pacing out every step for minimum time between steps, I am good to go.
Epic Fail
My first attempt is, as the boys say, an Epic Fail. I had bought a rectangular plastic box, with a tight lid, which I thought would do the job. It was cheap – because I knew I was going to pretty much destroy it by punching a hole in the top.
Ah. Lesson learned. Everything seemed to be going pretty well, until I got the vacuum hose onto the bag’s valve. It worked like a charm, sucking the bag tight to the sides of the box … and then the sides of the box buckled, breaking the tight seal on the top. I panicked and opened the valve – which you are definitely NOT supposed to do, as it will collapse any holes you have managed to produce in the chocolate.
I realized my error, banged the valve lid back on (the vacuum seemed to be holding) and shoved the whole thing in the refrigerator to chill.
An hour later, I had a “box of chocolate” which, to the naked eye, seemed unmarked on the top by any bubbles.
I woefully cut into it, and had a bit. Mmmm, actually, a lovely smooth texture, almost like a mousse. I suppose there are some very tiny holes in it. But I must have another go at this. The boys are delighted. They know the Epic Fails are destined to be theirs.
With the dress rehearsal under my belt, I invited the camera crew to document my next attempt.
This time, things worked out a lot better…
(this video is also on Vimeo)
In conclusion, to stay with the Scientific Method, I had great success with aerating chocolate, when I corrected my technique:
- making sure the siphon’s valve is completely closed when injecting gas cartridges
- not re-opening the bag’s valve once vacuuming is complete
- using an appropriately sturdy box (It is worth the extra $2.00!)
And the taste? Smooth, creamy, and quickly melts on the tongue. Our entire team of tasters (the family) agrees that the chocolate tastes like “mousse in a bar”. They liked the milk chocolate better. I am a bittersweet loyalist.
“You feel the bubbles?”
“I love the taste, texture and quality of the chocolate in these bubbles!”
“Oh, Mum!”


