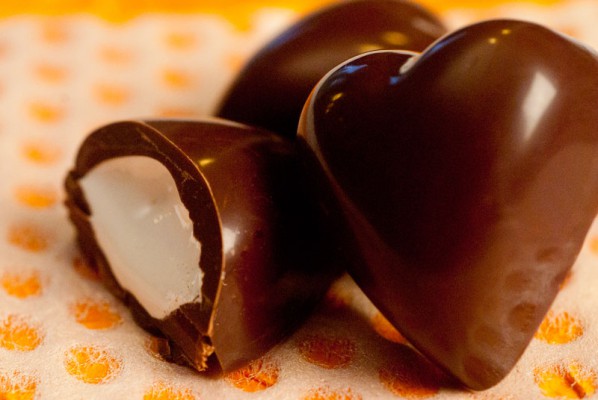
I am staring at these beautiful chocolate molds. It could be said that I have been helping to make molded chocolate since I was a very small girl.
For as long as I can remember, my Mum made “wee chocolate cups” – a recipe and technique she had learned during World War Two, when her Grandmother managed to secure her some contraband chocolate, and Mum shared it with her friends. One friend showed them all how to make these, filled with whatever they could concoct from the rations.
Some of my earliest memories are of sitting at the kitchen table on Sunday afternoons, a straight pin in one hand, and a tiny parchment paper baking case in the other, the inside of which was coated in a sheet of hardened chocolate.
My sister’s and my job was to slide the pin between the paper and the chocolate, and peel the paper off, leaving behind the “wee chocolate cup”. Mum would fill these with sponge cake, fruit, perhaps a dash of sherry, then pipe whipped cream on top, to cover.
These cups appeared at every family function we ever had. She was constantly asked to bring them to her own staff parties, at the Hudson’s Bay Ladies Shoes Department, and to my Dad’s Labour Relations Board parties. They always got raves, and people could not believe how easy they were to make.
I now make them myself, and the process always brings my Mum a little closer.
With the advent of silicon baking cups, I no longer spend hours with a straight pin, poking my fingers, and having the chocolate melt slightly, under my clumsy fingers, as I peel away the paper cups. I adore silicon! It’s bendy, but strong. The chocolate adheres to the sides of the forms, then pops out easily after hardening. I only wish Mum had lived long enough for me to get her a set.
I digress. And the professional, polycarbonate molds are still in front of me. They look pretty sturdy and very rigid. I wonder how the chocolate will ever unmold itself from them. I have visions of trying to pry hunks of stuck chocolate out of their intricate crevices with a knife, and giving myself another stab wound.
But, I am getting to know my chocolate a little bit better, and, instead of announcing what I’m doing with great fanfare, banning everyone in the house from the kitchen, I sneakily prepare some chocolate for tempering – about a pound – I even put a load of laundry in, and turn on the radio, get out the script for the lines I have to learn, as I do my set up. Sort of, sneaking up on the process, so I won’t be horribly disappointed if it’s a dismal failure.
I watch and re-watch the videos of the professionals skilfully pouring the liquid, perfectly tempered chocolate into the molds, flipping them over, giving the whole thing a tap, and producing beautifully thin shells for the fillings which they expertly squirt in, then cover with the bottom layer of chocolate. After this has hardened, they flip the whole thing over, give it a brisk tap, and out slide the filled and gleaming chocolates. Wow.
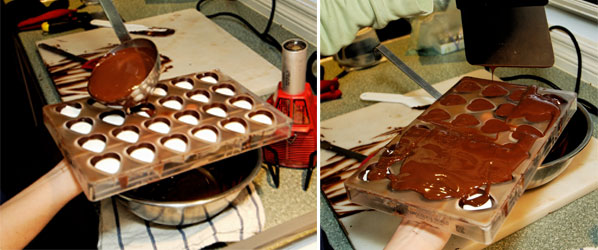
The whole thing looks elegant and slick and, dare I say it – really fun. I don’t want to get too cocky though, and I haven’t prepared a filling, so I start with some solid chocolate pumpkins. Chocolate tempered, mold slightly warmed over the pilot light on my oven, so as not to shock the chocolate and make it even more difficult to unmold, I pour in the chocolate.
… and make a HUGE mess. Feeling kind of like a kid with a really great smelling mud puddle, I scrape away the excess chocolate from the top and sides of the mold, the chocolate running over my hands and down the outsides of the bowl. Note to self: buy the widest-mouth bowl possible for this process. When the mold is as clean and level as possible on the top – it is very important to have the tops level, with no excess chocolate on the surface, between the chocolates or, you guessed it, they will not unmold properly – I set the mold on a marble slab and hope my kitchen is cool enough to set the chocolate evenly.
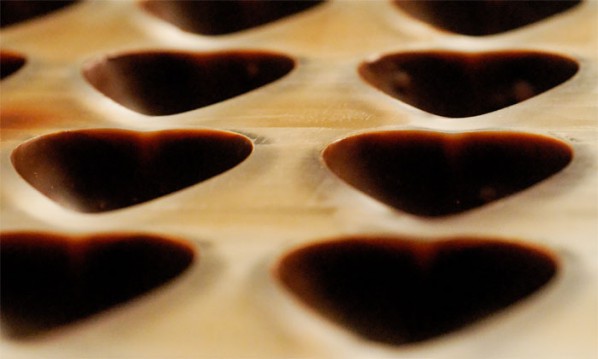
I have a great deal of chocolate left over, and those other beautiful molds sitting right there, so I grab the one I feel has the most forgiving design – the heart shape – and fill it. What the heck, go big or go home, I boldly decide. And with that, I upend the mold, and let most of the chocolate spill back into the (it is now painfully and messily obvious) undersized bowl.
But, wonder of wonders, it is working! I have, after I have scraped away the excess, twenty-four gorgeous, heart-shaped chocolate concavities in this mold. It is put to rest beside the other one and, just because I feel invincible, I grab the silicon mold I bought the week before, and fill it. A bit disastrous. I should have put it on a jelly roll pan, before attempting to fill it. Chocolate goes everywhere, and this time, as I scrape away the excess, the flexibility of the silicon makes doing this a bit like trying to put tights on my cat (No, I haven’t really tried that). It works, eventually, but I can see now, why the rigid ones are infinitely superior for this kind of work, especially if you are going to fill them.
Ah, yes. In my eagerness to master the shells, I have forgotten that I’m supposed to fill them. I am tempted to try a peanut butter cup filling, as I made some – using the “wee chocolate cups” – a couple of years ago, for Christmas presents, but I am loathe to have the seals of these, my first real molded chocolates, compromised by the oiliness of the peanut butter. Looking at the shapes, I think of Laura Secord Valentine’s Day Marshmallow hearts. I loved them, as a kid.
The marshmallow suggestion is met with a chorus of approval from my family, and I know that my teenaged acting students (to whom I have promised these, my first experiments) will also find this an acceptable filling.
I know I should make it from scratch, and I do look up the recipe, nod sagely and vow to make it soon, but I have rapidly setting chocolate and I don’t want to be in the kitchen all night – after all, I am very busy – and not really doing this, anyway.
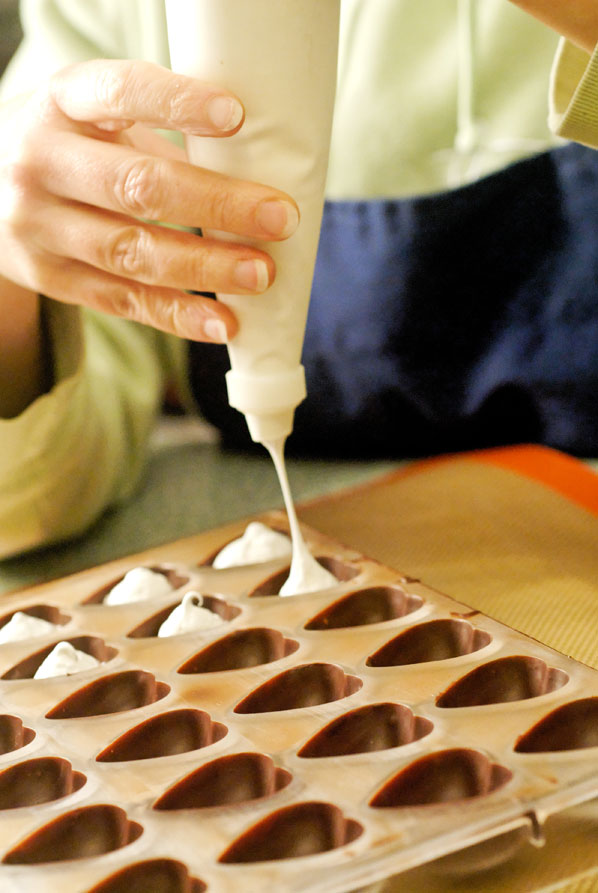
Instead, I went to the cupboard and got a carefully hidden jar of marshmallow fluff: an indulgence I had picked up for the boys, who developed a taste for Fluffernutter sandwiches from their Scottish cousin, who developed the taste after a year spent in the United States (now there’s a fine example of international cuisine).
I used my piping bag, without a tip, and squirted the sticky stuff squirted into the hearts. After leaving it a few minutes to level off, I re-tempered the rest of the chocolate, and poured on the backing layer. My heart almost failed me as I scraped off the excess chocolate, and some of the marshmallow started to come with it! I stopped, poured on more chocolate, gave it a tap, and scraped, more gently, to level the bottoms. I was very nervous, as I was convinced I had left on too much chocolate, it hadn’t been properly tempered, and I hadn’t properly prepared the mold … but they were in there now, and all that remained to be done was to wait and hope!
I did my laundry, studied my lines and bit my nails. And then I started to hear a slight cracking noise, indicating the chocolate was contracting and pulling away from the sides of the molds … which was what was supposed to happen! I checked the underside of the molds and, indeed, it did look as though they had slightly released. I called my partner, who wanted to be there for the moment of truth.
“What do you have to do to make them come out?”
“Turn the mold over and whack it down on the slab.”
“Pardon?”
“You heard me.”
“And that makes them come out?”
“Of course.”
“Have you done this before?”
“N-ooo.”
“What if they don’t come out?”
“Can we stop talking about this?”
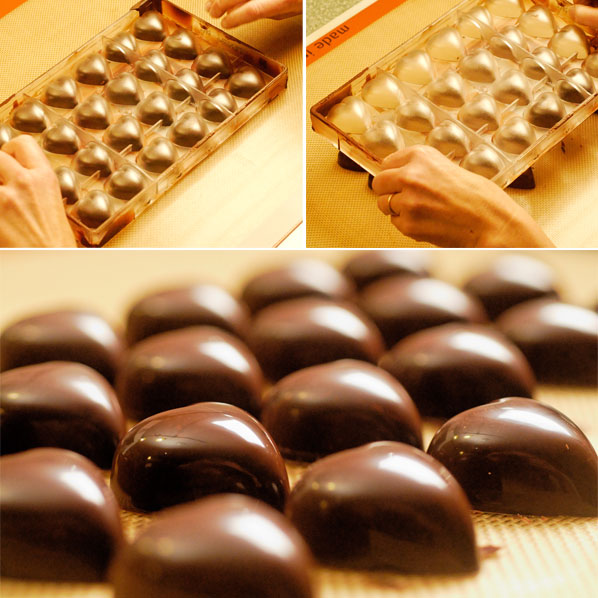
With that, I upended the mold and whacked the whole thing down on the slab. And then, we both held our breaths, and I lifted up the sides … and twenty-four, glistening, perfect marshmallow-filled hearts sat on the slab.
And we both said, “Cool.”
And my family loved them. And my students loved them.
So much that they have all offered up suggestions for “teen favourite” fillings.
So the next time I venture into the kitchen to mold chocolates, it will be with great confidence. I will have my home-made, organic, fresh fruit puree filling ready. And I can’t wait to try ganache. And, in honour of my students, I will also try one involving potato chips.
And perhaps I will try one with sponge cake, sherry and whipped cream – and in honour of Mum.
I will call it: The Betty.


